Wednesday, May 30, 2012

Our toddler is becoming a picky eater


We'd been lucky up 'till now.  Sure, sometimes I enjoyed thinking that it was due to our merit, but overall, we'd been aware that Babygirl's grand experimental appetite was something to be celebrated, and very much a part of her personality.   I mean, she used to eat whatever we'd put on her plate with gusto.


Alas, it is no more.

As of a week ago, due to mysterious reasons (most likely being almost two years old), Babygirl has decided that she no longer likes vegetables and many previously beloved fruits.  It's an annoying setback, but certainly nothing to fret over. While I'd prefer that she eat wholesome balanced meals with a healthy heap of leafy greens, it's also true that even if this new development not ideal, she will still survive and thrive.  We will keep offering her healthy food options off our own plates and maybe she'll have some, maybe she wont, but in the end, as long as she's having some lean proteins, fruits and some good carbs, nothing is too tragic.

Our main focus is keeping meals happy occasions.  I never want to force Babygirl to eat anything against her will, and have her hate dinner time as a result.  And while I'm not above "hiding" veggies in the recipes, I still think she needs to be aware of exactly what she's putting in her mouth.  It's a trust thing, really.  If I tell her something is a bite of chicken, but it's actually chicken and mushrooms (which can look similar due to their coloring, but definitely taste different), then she might not trust me again next time I offer her chicken.  Right?

So far this problem hasn't been too daunting, because she has picked her favorites, and they're mostly healthy and simple to prepare.  We'll see how this progresses, and I'm mentally preparing myself for much worse.  Meanwhile, I still refuse to accommodate this pickiness too much.  We are not running an a-la-carte kitchen here, after all.

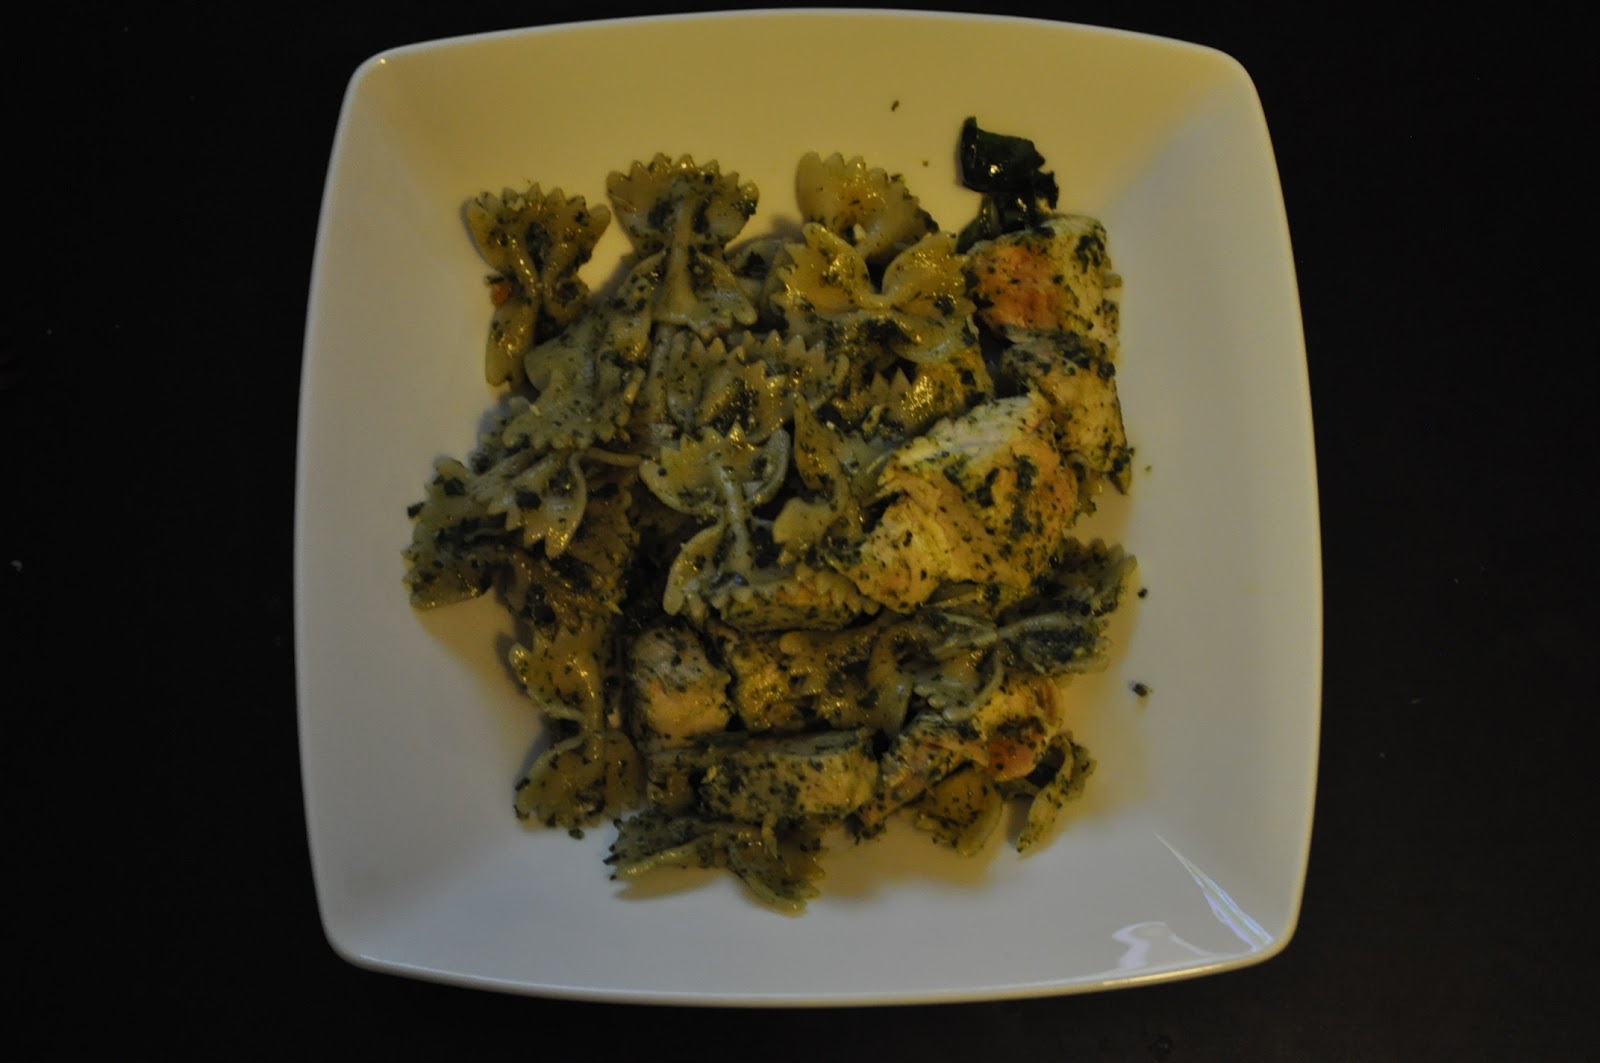
Foods she still loves:  chicken (cooked in any way imaginable), rice (brown and white), whole wheat pasta, turkey deli meat, salmon, bananas, apples, oranges, cheddar cheese, greek yogurt, butternut squash, tomatoes depending on the preparation, tortillas, whole wheat bread, whole-wheat waffles, crackers

Foods she used to love and is now refusing:  zucchini, mushrooms, hamburger, yellow squash, peas, blueberries, grapes, asparagus, strawberries, carrots, mashed potatoes, hummus

Foods she loves and I wish she didn't like so much:  french fries, goldfish crackers, cupcakes (any type of cake, really, she can spot those a mile away)

And she refuses to drink any type of  juice, which is still very amusing.  


Friday, May 4, 2012

Pesto Pasta with Chicken

I've had this strange fear of pesto for a while.  Even though "they" say it's actually very easy to make, it always seemed like a daunting restaurant type dish.   But then I realized that if I can make risotto, then pesto pasta should be a piece of cake.  And it is, seriously, so easy.  I almost feel foolish for not having this dish in our weekly rotation until now.

I decided to start with a very traditional pesto, which consists of basil, pine nuts, garlic, olive oil and Parmesan cheese.   Once I get the hang of this, I shall expand to some of the flavored pestos of the world.  I'm really curious about infusing some bell peppers into this business.

I've also discovered that our immersion blender once again rocks our world.  We haven't had a proper blender for a while (it got fried blending baby food... I know, right?), so we figured we'd just go for it and use our $30 immersion blender.  Let me tell you, it works well.  And clean up is much easier when you don't have to deal with separating the blades from the container, etc.   I'm all about minimizing clean up, y'all.

The recipe calls for what seems to be a lot of olive oil, but the end result didn't feel terribly greasy.  In any case, I've done the calorie count, and by the time you factor in pasta and chicken breast, the total meal comes out to be heart healthy enough.  Not the lowest fat dinner out there, but we all need treats once in a while.

This recipe is adapted from Pasta, from Parragon Publishers.

Ingredients
  • 1 lb chicken breast, skinless, boneless
  • Farfalle Pasta (one 14oz bag)
  • 3 1/2 shredded fresh basil
  • 4 fl oz extra virgin olive oil
  • 3 tbsp pine nuts
  • 3 garlic cloves, minced
  • 4 oz freshly grated parmesan cheese
Directions
  1. Cook pasta in plenty of lightly salted boiling water according to package directions.  Drain, but do not rinse.
  2. Cook chicken breast on a lightly oiled skillet, until the the middle is no longer pink.  I find it useful to cut the chicken into strips before placing it on skillet.  When it's done, cut cooked chicken into small cubes.
  3. To make pesto, place basil, olive oil, pine nuts, garlic, and salt into a blender/ food processor. Transfer mixture to a bowl and stir in cheese (this step is not necessary if you use an immersion blender.  yay!).  This is also a good time to season with salt and pepper.
  4. Combine pasta, chicken cubes, and pesto on a warm serving dish (or if you're trying to minimize dish-washing, into the same pot where you cooked the pasta). 
  5. Toss well to mix, and garnish with fresh basil leaves.

Toddler Ratings   hearth healthy: yes     spicy: no      easy to chew: yes      ease of preparation: easy      reheating:  tastes even better reheated   food groups: carbs, protein, veggies, healthy oil

Tuesday, April 10, 2012

Goat cheese, Tomato and Bell pepper Frittata

Frittatas are one of those things that defy description.  I mean, they can be everything you want them to be.  You can change any ingredients or flavor profiles.  So long as it's egg based, and open faced, right?

This was my Easter Sunday last minute fridge version.  I meant to do a well-loved frittata recipe from The Bride and Groom First and Forever Cookbook (which is actually a great resource for 2 person dishes), but I forgot to take the shopping list to Central Market with me, and I couldn't remember what I needed.  So I just figured I'd get some goat cheese, since you can't go wrong with that, and sort it out later based on what was in my fridge.  This one came out delicious, but you don't have to go by my "toppings".  Put whatever you want in it. The sky (and your wallet) are the limit.   I'm a sucker for presentation, though, so I try to get a diversity of colors.  In this case, we have white (cheese), red (tomato) and green (bell pepper), yellow (eggs).  My grandma once told me that a balanced meal has at least 3 colors, and I've always tried to honor this advice.

The main thing to remember is that the skillet will end up in the oven, so make sure there's cheese to melt on top.  Oh, and make sure you have good oven-friendly cookware.  We have some nice cast-iron pans, and they rock.

Ingredients
  • Half yellow onion, diced
  • 5 eggs
  • 1/2 cup milk
  • 2 - 3 oz goat cheese
  • 2 roma tomatoes, chopped
  • 1/2 bell pepper, chopped
  • salt and pepper
Directions
  1. Preheat broiler
  2. On an oven proof large skillet, saute onion and bell pepper until onion is translucent and peppers are soft.  Set aside.  Make sure you do this step, otherwise the onion and pepper wont release their yummy sweetness
  3. While the veggies are sauteing.  On a medium bowl, whisk eggs and milk together.  Add salt and pepper.  
  4. Pour mixture on skillet, and add the previously cooked onions ad peppers.  Add chopped tomatoes.  Cook uncovered on medium-low heat.  Scatter goat cheese on top
  5. Cook until the eggs are set on the bottom, probably about 5 - 10 minutes (depending on how preheated your skillet was).  While the eggs are cooking, lift an edge of the frittata with a spatula and let the uncooked eggs flow underneath.  Repeat in a few places.  This is also a good time to season.
  6. When the eggs are almost cooked, put skillet in the broiler.  Cook for 2-5 minutes, until the eggs are set  n the center.
  7. Let cool for a few minutes and... Enjoy!

Now for a confession... Babygirl didn't really eat this.  This doesn't, however, mean that it's not toddler friendly.  She has a mild egg allergy, where she gets a slight rash on her face when she eats them.  It really feels like something she'll grow out of, but as a result she hasn't developed a taste for eggs.  Her loss, I guess, right?  She's got the rest of her life to embrace breakfast foods.

Toddler Ratings   hearth healthy: not on its own, but this should be part of a balanced breakfast     spicy: no      easy to chew: yes      ease of preparation: easy      reheating:  yes      food groups: eggs, dairy, veggies


Saturday, March 31, 2012

Cauliflower Quiche (without crust)

Can it really be called a quiche if it doesn't have a crust?  A simple Google search tells me YES, though it seems I should specify its crust status, should it otherwise upset quiche purists.  Purists be damned.  I'm not even sure this is a proper quiche, since it's more of a dinner side dish.

This is also a good item for potlucks, as it travels and reheats very well.  Babygirl enjoyed it, though I think she found this version a bit too mushy.  Usually I leave some pieces of cauliflower unblended for extra crunchiness, but we were going for speed rather than perfection.  This recipe is either super easy or incredibly laborious depending on how you feel about cleaning your blender.  I hate having to take it apart and washing it, so I seldom make this dish.

In the pan

Ingredients
  • 1 cauliflower head, chopped into small pieces
  • 1 -2 cups of milk
  • 3 eggs
  • 1 cup mozzarella cheese *
  • salt and pepper

Directions
Bear with me as I try condense into writing something I've always eyeballed. I think I got it right, but if at any point while you're cooking, something is looking off, trust your chef gut and change it.  For reals.
  • Set aside a fourth of the cauliflower and chop into very tiny pieces.  Leave on a separate bowl.
  • On a blender, add some of cauliflower (from the main batch) and milk (enough to cover it) and blend until smooth.  Add more cauliflower slowly, and milk if necessary to achieve a smooth consistency.  (You might not use all 2 cups of milk, and that's okay, since it really depends on how much cauliflower you had to begin with.)
  • Add eggs and mozzarella and blend again
  • On an oven container (I use this pirex dish, for reference), pour mixture and add extra mozzarella and the extra cauliflower previously set aside. **
  • Put in the oven for.... man, I'm not sure, was it 20 minutes at 350?  I've also made it in the microwave for 20 minutes.  I would recommend doing the "knife check" after 15 - 20 minutes, and add time as necessary. (You know, that baking trick where you put a knife into your item, and if the knife comes out streak free it means it's been properly baked)

* My mom and I have an ongoing discussion of whether this should be shredded commercial mozzarella or fresh mozzarella balls chopped into pieces.  The fresh mozzarella is definitely tastier and creamier, that's for sure.  But I usually use the shredded type for three very simple reasons:  1) it's pre-cut, which is just easier  2) spreads more evenly in the mixture 3) there's low fat and skim options, which makes a big difference for our heart-healthy purposes

**  The extra mozzarella and cauliflower are for additional crunchiness and texture.  Many times, when in a rush, I end up skipping this step and the quiche comes out just fine.  You can also add some shredded Parmesan cheese at this point since it cooks so nice in the oven.

Toddler Ratings   hearth healthy: not the lowest fat item out there, but hey, it's got a veggie!      spicy: no      easy to chew: yes      ease of preparation: easy      reheating: yes      food groups: dairy, veggies

Friday, March 30, 2012

Wacky Cake

You know what makes this cake wacky?  No eggs or milk!  So... I guess it's a certified vegan dessert.  (Except the frosting, which originally didn't have butter or milk, but my family added them at some point for taste.)

We've been making Wacky Cake in my family since I can remember, and it's always been the go-to dessert  for every birthday.  My aunt learned it in her childhood from a school friend.  Apparently, Wacky Cake is a  US depression era dessert, when people had to rely more on their pantry non-perishables.  Curiously enough, even though my aunt grew up in Peru, her school friend had US relatives, so I'm pretty certain my Peruvian family has been making an American dessert classic all these years, without knowing it.   I love the idea of recipes being passed through oral tradition, and it goes something like this  Person in US --> Peruvian relative --> daughter --> my aunt -->  my mother  --> me  --> you

This is also a great dessert to make with  your kids, since its a pretty straightforward single bowl concoction.   Babygirl is still too young, and doesn't have the attention span, but she did stir the wooden spoon a few times, and thus did participate.

One of my favorite things growing up was decorating the cake.  I would use Lentejitas (the Peruvian M&Ms) and make all sorts of visual patterns and pictures using the different colors.  Sometimes it was geometric, sometime we'd spell things, but it was always festive.

Cake a la mode

Cake 

Ingredients
  • 3 cups of flour
  • 2 cups sugar
  • 1 tsp salt
  • 2 tsp baking soda
  • 1/2 cup unsweetened cocoa
  • 2/3 cup vegetable oil
  • 2 cups water
  • 2 Tbsp white vinegar
  • 2 tsp vanilla
Instructions
  1. Preheat oven to 400 °F
  2. On a large mixing bowl, mix all the sifted dry ingredients (flour, sugar, salt, baking soda, cocoa).  Mix with a wooden spoon.
  3. Add the wet ingredients to the bowl, in no particular order (oil, water, vinegar, vanilla).  Mix thoroughly with a large wooden spoon as you add each one.  (you don't need to use any electric blenders)
  4. Put mixture on a buttered 9" mold, and bake for 50 minutes.  At that point, check with a knife if the cake is made, otherwise, leave inside for 10 - 15 more minutes.  The knife should come out streak free.
Chocolate frosting

Ingredients
  • 1 cup sugar
  • 1/2 cup unsweetened cocoa
  • 2 Tbsp corn starch
  • 1 cup milk
  • 1 pinch salt
  • 2 tbsp salt
  • 3 Tbsp butter
  • 1 tsp vanilla
Instructions
  1. On a small bowl, sift sugar and cocoa.  On a different small cup, mix corn starch into milk
  2. Melt butter on a small pan, under low heat
  3. Add dry ingredients to butter and mix vigorously with a wooden spoon, and quickly add milk/corn starch mixture.  Add vanilla and salt
  4. Keep stirring on low heat for 15 minutes or more until mixture feels thick, yet still liquid.  You do NOT need to see the bottom of the pan when you stir.  This frosting will not have the consistency of store-bought hard frosting
  5. While still warm, pour frosting on cake, it should move like a liquid.  After it cools, it will harden.
Toddler Ratings    heart healthy: no, but it's a special occasion dessert, all part of a balanced diet      spicy: no      easy to chew: yes      ease of preparation: simple      reheating: not necessary     food groups : sweets

Wednesday, March 28, 2012

Banana bread

Hands down, the easiest solution to the dreaded browning-banana problem.  I don't know about you, but we end up with a surplus of bananas in this house.  Mostly because Babygirl loves bananas, and it's our panacea for all food related issues.  In fact, she even takes a banana to preschool every day, just in case she doesn't like the lunch/snack and needs something to eat.  We average one banana per day.  

So why so many extras?  Well, it's simple.  When you know your toddler needs their daily banana, you end up buying a bunch every time you go to the store, and sometimes we buy too many.  Also, I'm discovering that not all bananas are created equal, and some brown much faster than others.  (Mental note: look into why this is, and how to keep bananas fresh longer.)

I'm a fan of single-bowl baking projects, and this bread is as easy as they come. The recipe is pretty low in sugar and fat (considering how bad it could be), and we've liked it as a transitional sweet.  In fact, this was the first "dessert" Babygirl ever tasted, when we had a playgroup goodbye picnic before our last move.

what happens when your toddler attacks a loaf of banana bread

The recipe came from some Internet source, I believe Cooks.com.  Who knows, it's been transcribed to paper, to a shopping list, and then to email, and this is my latest copy of it

Ingredients
  • 3 bananas, well mashed
  • 1 cup of sugar
  • 2 eggs
  • 1/2 cup vegetable oil
  • 2 cup flour
  • 1 tsp. baking soda
  • 1/2 tsp. salt

Directions
  1. Preheat oven to 350 degrees
  2. Mash bananas in mixing bowl.  Add sugar, eggs  and oil, making sure to mix thoroughly with a wooden spoon each time
  3. Mix dry ingredients together and add to the banana mixture
  4. Pour in greased loaf pan and bake for 60 minutes

Toddle ratingsheart healthy: yes     spicy: no     easy to chew: yes, finger food     ease of preparation:very simple     reheating: not necessary, easy     Food groups: carbohydrate, fruit?

Tuesday, March 27, 2012

Pan fried salmon with butternut squash mashed potatoes

It's only the second Weekly Challenge (along with our friends from read it // eat it) and we're already behind.  Funny thing happens when you blog about feeding a toddler, yeah, sometimes that toddler takes a lot of attention.  

Read more here about this week's theme: the Ocean.  We decided to go with salmon because we love it's natural fatty buttery flavors, and it's a fairly easy protein to cook.  We are trying to give Babygirl more fish, since "they" say omega oils are good for the brain, right?  We need her learning more animal sounds.

The fish is simply pan-fried; nothing fancy or complicated.  It's pretty similar to how my mom cooked fish when I was growing up.  Really, with salmon, there's no reason to add any seasoning beyond salt and pepper, the fish itself is rich and creamy.

The mashed potatoes with butternut squash is my idea, based on something I must have read on the Internet at some point of my life, though I'd be hard-pressed to figure out where.  It substitutes butternut squash, a naturally buttery tasting vegetable, for cheese, butter and/or cream.  Result: non-fat (yet creamy) mashed potatoes.

Babygirl's Plate

Adult Plate

Ingredients

Fish
  • Salmon (a single portion is 6 oz) *
  • 1 medium yellow onion, sliced 
  • Olive oil
  • salt and pepper

Mashed potatoes

  • 1 medium butternut squash, peeled and cut into 1/2 inch chunks
  • 3 potatoes, peeled and cut into 1/2 inch chunks (this is the part where I specify the best potato for mashing, but I'm not that knowledgeable.  For the record, I am content to use russet)
  • salt and pepper

Directions

  1. On a large pan, place butternut squash and potatoes.  Cover with water and set to boil.  Once boiling, lower temperature to keep at a slow simmer for 20 - 30 minutes, until both squash and potatoes are soft.
  2. On a medium pan, heat a small bit of olive oil (just a tiny tiny bit, but you need it for the onions).  Cook onions until they are translucent
  3. Season fish with salt and pepper on both sides and put on the pan, over the cooked onions.
  4. After the fish is cooked on one side, flip it over to cook on the other.  Salmon turns a distinctive "salmon" color when cooked.  I personally let it brown a bit on both sides, as I think it makes it tastier.  And yes, the fish often falls apart during the flipping process; it's no biggie.
  5. Check on the mashed potatoes, and if cooked through, remove extra liquid.  Mash until desired consistency and season.
  6. Done !
* My new discovery for removing salmon skin: the fish monger will do it for you!!!  At lest they do at Whole Foods, though I'm sure other places would too.  

Toddle ratings: heart healthy: yes     spicy: no     easy to chew: yes, super mushy     ease of preparation: very simple     reheating: only mashed potatoes, but they can be a side to any protein     3 food groups: protein, vegetable, carbohydrate

Thursday, March 22, 2012

Lunch Box

I'm really big on having Babygirl eat whatever I would be eating, which is how her packed lunches end up looking eerie similar to what I would take to school.  I fear her current on-the-go lunch/snack is wholly unoriginal, but I guess there's plenty of time in the future to figure out other alternatives.

For the record, I despise peanut butter - the smell alone makes me gag.  So no, my kid will not be having  the ol' american classic peanut butter and jelly any time soon.

This is pretty much what's always on our bag.  If we have a proper lunch that day, then any of these items can be a nice healthy snack.


Lunch box from skip hop, and its a pretty perfect size for a full lunch

Lunch contents:
  • 2 graham crackers
  • 1 banana
  • 1 small container of blueberries
  • 1 sandwich (1 slice whole wheat bread, cream cheese and turkey meat)
Basically, we both end up having a similar lunch, since this is pretty much what I'd be eating anyway (except blueberries, I don't like them).  It's healthy, low fat, and fresh.  Ideally, it'd have more vegetable, but Babygirl is going through an anti cold veggies phase, which she'll hopefully grow out of soon.

Thursday, March 15, 2012

Monkey Cake

We made this cake for Babygirl's first birthday party, and it was a smashing success.  See what I did there?  "Smashing", because toddlers smash pastries on their face?  Folks, I'll be here all week.

This is a great dessert because it's tasty, but is also a good "first" cake since it's more banana based and thus lower sugar.  Do you like banana bread?  Then you should like this.  I think I'd been looking forward to making the first birthday cake since we brought Babygirl home from the hospital.  And I'm not even a good baker!  Funny how we fixate on certain things

In the end it was pretty straightforward to bake, and the Smitten Kitchen instructions were flawless.  I needed some help with the actual face decorating, since it takes a smooth grip to make straight lines with frosting.  Luckily, Babygirls's uncle (also known as my younger brother) was more than happy to take over the final decorative touches.  He's got nerves of steel.


Monkey cake

Cupcake smash cake


I'm not even going to attempt to transcribe the recipe, since baking can be really complex. And really, it's a science,and you should never (never!) mess with baking ratios.   The link below will take you to the original recipe, and also 3 different ways to approach making the monkey face.  For what it's worth, we did option 2 - two 9" layers for main face, ears made of cupcakes and extra cupcake smash cake.

http://smittenkitchen.com/2010/09/monkey-cake/

Wednesday, March 14, 2012

Eating Out: Central Market Westgate

Went here to lunch today, and it's an okay place for toddlers.  For starters, there's no waiters, so you can eat (and leave) at your own pace.  They have booster seats and high chairs.  The vibe is relaxed, and casual.

The children's menu is terrible (too much greasy cheese), but no issue, we tend to order off the adult menu anyway.  Babygirl ate Grilled Chicken Breast, which included herb marinated chicken, grilled vegetables (zucchini, bell pepper, onion), and jasmine rice.  It was tasty and healthy, and she liked it.  Though our main problem was that I also ordered a chipotle aioli chicken sandwich for myself, and, of course, she wanted a taste of it.  The sandwich was delicious, but unfortunately too spicy for Baby girl.  So for future reference, we should order all dishes that she can eat.

They have changing tables in the bathroom, and of course, the grocery store itself is right there for any extra needs.  There's no playground, but a toddler can run around the cafe and store without attracting any attention.


Monday, March 12, 2012

Weekly Challenge 1: Tomatoes "Heirloom Tomato Pasta Salad"

Our friends over at  Read It, Eat It have decided to start a weekly challenge.  To which I say:  Bring it On!

For this week, we settled on a feature ingredient: tomatoes.  This might not have been the best on planning on our parts, since it's not tomato season yet.  But nevertheless, we cooked our favorite heirloom tomato pasta salad.  We'd made it before, pre-baby, and I was curious as to how Babygirl would react.  She liked it, but with trepidation.  It took two tries for her to eat her whole portion - first time she ate only the pasta, second time we realized that some pieces of tomato had too much skin, and when we took those out she ate the tomatoes happily.

This recipe is light, and fluffy, and really highlights the tomato flavors.  You have to use heirlooms, otherwise it won't taste as good.  In all honesty, I haven't tried it with other types of tomatoes, but I just kinda have the feeling.  Also, the creme fraiche adds a wonderful lightness to the taste.

I had some questions on the fat content of this meal, because y'all, have you seen creme fraiche?  It's the creamiest milk fat e-ver! But alas, I went OCD on the recipe and calculated the nutritional information on an excel spreadsheet (yes I did, *sigh*).  And even though both olive oil and creme fraiche are straight up fat, by the time you include all the pasta and tomatoes, it balances out to a nice 35% calories from fat content.


This recipe comes from Gourmet magazine, Sept 2009


Ingredients
  • 1/4 cup extra-virgin olive oil
  • 1/3 cup creme fraiche
  • 1 tbs white-wine vinegar
  • 1 teaspoon of sugar
  • 2 lbs heirloom tomatoes (about 4 mediums ones, the fresher more farmer's market friendly, the better)
  • 1 medium shallot, finely chopped
  • 1 lb fusilli or other short spiral pasta (whole wheat)
  • 3/4 cup fresh chopped mixed herbs, we used basil and thyme
Directions
  1. On a large bowl, whisk together oil, creme fraiche, vinegar, sugar, salt and pepper.  
  2. Coarsely chop tomatoes.  Toss them into bowl, along with shallots. 
  3. Marinate tomatoes for at least 10 minutes
  4. While tomatoes stand, cook fusilli in boiling water until al dente.
  5. Drain pasta quickly and add to bowl with tomato mixture, tossing to combine
  6. Cool to room temperature (do not chill), toss in herbs, and stir again

Sunday, March 11, 2012

Gourmet Chicken, or Chicken with Balsamic reduction

My brother named this "Gourmet Chicken," and I can still remember the night it happened.  My parents were out of the country on a trip, so my my then teenage brother and I were home to fend for ourselves.  We came up with this variation on simple pan-fried chicken just playing around with ingredients.  And it came out really tasty!

Over the years, it's become a staple for dinner at my house because it's just so simple to make.  For those days when you don't feel like cooking, but still want that homemade goodness?  Gourmet chicken it is!  I've also simplified it over time, for efficiency's sake, though sometimes I'll add fresh Italian herbs or white wine for extra flavor.

Babygirl loves this chicken, and will munch on it happily.  My main concern with this meal is the lack of vegetables integrated into the dish.  We usually end up eating it with a side of steamed frozen veggies, if even that.  But really, we aren't fans of stand alone vegetable, too bland tasting.

Ingredients
  • 1 lb boneless skinless chicken thighs, cut into small pieces.  (with fats removed) 
  • 1 large yellow onion, sliced
  • 2 garlic cloves
  • 2 tbsp olive oil
  • 1/2 cup balsamic vinegar*
  • 2 cups rice
  • salt/pepper
Directions
  1. Cook rice and set aside.  We use a rice cooker, so this step is a non-issue, but you can follow any process you prefer.**
  2. On a medium/large pan, preheat olive oil and cook onions and garlic until onions look clear.  You can use more or less oil, as needed, but we've found that you need some olive oil to get the best taste from the onions.  Heart healthy cooking doesn't mean fat free, just low fat, so some oil is good.
  3. Add chicken and season with salt and pepper.  Stir.
  4. Once the chicken is browned and cooked all the way, add balsamic vinegar to pan.  Stir chicken and the balsamic with naturally reduce.  Do this for about 5-10 minutes, adding balsamic vinegar slowly until the chicken is coated in it.
  5. Optional: After taking the chicken and onions out of the pan, you can put the rice on it and soak the leftover oil/balsamic reduction.  This "dirty" rice comes out de-li-cious.
* I'm not actually sure how much balsamic vinegar goes on this, as I've always eyeballed it.  However, I tend to be pretty liberal with the balsamic, as it reduces to a delicious consistency.
** I strongly prefer the taste of white rice, but that's just me.  Brown rice is healthier

Monday, March 5, 2012

Chicken and mushroom spaghetti

My brother visited for his college spring break, and took it upon himself to cook us a meal as a sign of appreciation.  He's one of those people who makes up recipes on the spot, and tries new things all the time.  Sometimes it works, and sometimes it doesn't, though I've never been around when it doesn't work.  Man, he's a good cook.

He made up this recipe based on previous experiences cooking pasta.   I'd definitely make it again, as it's pretty simple in concept, though I will make some amends to use less utensils.  We had too many dishes to wash that night. And one of the golden rules of eating with a toddler is to make it simple, and clean-up easy.  I'd also like to cook it with less butter.  I love the butter taste, and think it goes great with wine (how very french), but I worry about the heart-healthiness of it all.

This was Babygirl's first time with sauteed mushrooms, and she loved them.  Soft, tasty, and a great veggie.  We already knew she liked chicken and pasta, so no issue there.

Ingredients
  • 1 pack of spaghetti (we prefer whole wheat)
  • 1 1/2 tbl spoons butter
  • 3 cloves of garlic
  • 1 lb chicken breast, chopped to bite size pieces
  • 6 oz mushrooms, sliced thin (we used cremini)
  • 1/2 bunch of parsley, chopped
  • 1/2 cup heavy cream (we substituted with half n half because it's what was in the fridge)
  • 1 cup white wine
  • salt and pepper to taste
Directions
  1. In a medium bowl, marinate chicken with white wine, season with a little bit of salt and pepper.  Let sit for at least 10 minutes.
  2. Cook pasta al dente.  Do not drain.
  3. On a medium skillet, melt half the butter, and cook chicken at low temperature.  At this point, you can squeeze half a lime for extra flavor
  4. On the largest skillet you own, melt the remaining butter, and cook garlic until golden brown.  Add the sliced mushrooms, and continue cooking the mushrooms until the liquid reduces away.*  Season periodically with salt and pepper
  5. Add the pasta to the large skillet (do not strain, take directly from cooking pot to skillet with a slotted spoon or tongs), and add the chicken to the large skillet.
  6. Add the heavy cream, parsley and remaining chicken marinade.
  7. Cook for 5-10 more minutes.
* for an additional punch, add 1 or 2 shots of vodka to mushrooms after 5 minutes of cooking.  We didn't try this because of Babygirl, but my brother swears it makes the sauce tastier.

Tuesday, February 28, 2012

Spanish Chicken with Rice

Great easy recipe and one of our go-to dishes.  It's made in the crock-pot, which means that it takes some upfront dedication. In fact, the prep takes a bit longer than I'd like, so I reserve for a Sunday afternoon cooking session.  But after it's done, it's mushy goodness, easy to store and reheat for at least 2 weeknight dinners. I've been embracing our crock-pot a lot, so much that we recently upgraded to a brand new model.

It also passes our toddler seal of approval: heart healthy, has 3 food groups (protein, carbs and veggies), easy to chew, and easy to reheat.

Babygirl loves this dish, and will eat it heartily.  We've also experimented with adding zucchini and yellow squash, and it works pretty well.   Please note that we don't give our kid sausage, as we feel it'd be too fatty.  However, we cook it all together for the flavor.   More sausage for the adults...


The recipe is slightly adapted from the "Crock-Pot Slow Cooker Bible"


Ingredients
  • 2 table spoons olive oil  * we don't use oil, just heat ingredients in a Teflon pan
  • 11 oz cooked kielbasa, sliced into 1/2 inch rounds
  • 1 lb boneless, skinless chicken thighs *for a leaner option, you can use chicken breast, and it still tastes juicy
  • 1 onion, diced
  • 5 cloves of garlic
  • 2 cups white rice 
  • 1 cup diced carrots *or more
  • 1 bell pepper, cored, seeded and diced
  • salt and pepper for seasoning
  • 1/4 teaspoon saffron threads
  • 3 1/2 cups chicken broth  *preferably homemade or sodium-free
  • 1/2 cup frozen peas, thawed
Directions
  1. On a medium skillet, brown sausage on both sides.  Transfer to crock-pot with slotted spoon.  You could also blot them with a paper towel to reduce the fat content
  2. Add onions, garlic to skillet.  Add chicken and brown on all sides.  This is easier if the chicken is cut into small pieces.  Transfer to crock-pot
  3. Add rice, carrots, bell pepper, salt, black pepper and saffron to crock-pot.  Pour broth over mixture until everything is just covered.  This should be about 4 cups.  Cover, cook on HIGH for 4 hours.
  4. Before serving, stir in peas.  Cook for about 15 minutes.  It helps if your crock-pot has a WARM setting.

Sunday, February 26, 2012

Super Simple Chicken Soup

We made this because Babygirl is sick, and you know what they say, chicken soup is the best for colds. My mom taught me this recipe, and it is one of those things that's in the family and has never really been written down.  I like it because it tastes great (always a plus), and is super easy to make.   

My personal rule with chicken soup is that you should be able to make it for yourself when you're sick.  So efficiency is of the essence.

Ingredients

  • 1 lb of chicken drumsticks or thighs (the soup comes out tastier if the chicken has bone, but then it's harder to eat later)
  • 1 onion, cut into quarters
  • 2 potatoes, cut into large pieces
  • 3 celery stalks, chopped
  • 3 carrots, cut into large pieces (if using baby carrots, about a third of a pack, no need to chop)
  • 2 tomatoes, cut into quarters
  • salt and pepper
  • oregano
  • 1/3  pack of angel hair pasta
Directions
  • Put a bit of water on large pot, add chicken, onion, potatoes, carrots, celery and tomatoes.  Add water until all ingredients are covered
  • Put on high heat until boiling, then lower temperature to lowest setting and simmer covered for at least 30 minutes.  The longer it simmers, the softer the veggies.   Check that chicken is cooked with a fork.
  • At the very end, season with salt, pepper and oregano.  At this point, also put pasta and boil for only 5 - 8 minutes
  • Enjoy
Notes
  • This soup can be as easy or complicated as you want.  Personally, I keep my veggies very large because the whole boiling process makes them mushy.  Also, I like eating big chunks of onion.  If you want to chop the veggies into tiny pieces, suit yourself.  I'm just lazy.
  • It's very easy to make substitutions. Sometimes, I skip the tomato or celery, depending on what's in the fridge.  Though I keep the veggies in the Mediterranean family.  
  • This is a recent tip I learned from my aunt: put the oregano at the very end.  Apparently, if the oregano boils and simmers for too long, it can taste bitter.  While if you throw it in at the very end, it keeps a fresh taste
  • Many times we substitute sweet potatoes for the potatoes.  Babygirl loooves sweet potatoes.
  • For kids, it's probably easier to substitute soup pastas.  When I was a kid, I loved alphabet or star pastas.  Easier to put on the little spoons.
  • The veggies and chicken should come out very soft and mushy.  Excellent for kids without molars.
  • It's very important to choose a part of the chicken with natural fats.  We currently prefer boneless skinless chicken thigh, making sure to keep the pieces the fatty sections.  Without the chicken fat, the soup lacks flavor.  It tastes even better if the chicken has skin, but it's a hassle to serve with a toddler.   If you're using lean chicken breast, I'd recommend adding a bit of olive oil.

Saturday, February 25, 2012

Low Fat Blueberry Frozen Yogurt

Babygirl just got diagnosed with her first ear infection, and the doctor prescribed her antibiotics.  Apparently,a antibiotics can wreck havoc on a toddler's digestive system, and we were recommended yogurt to help balance the side effects. Any flavor, and any fat content, so long as it has a live culture.

Ahhh... yogurt.  Unfortunately, Babygirl decided to be a picky eater today and refused the Greek yogurt she usually gobbles up for breakfast.  So what's a creative parent to do?  What's that thing Mary Poppins says?  Just a spoonful of sugar.... right?

We have a single serve ice cream maker that we'd been dying to use.  The system is simple: pre-freeze the bowl for at least 8 hours, place ingredients on bowl, and place lid on it.  The lid comes with special blades that blend the ingredients into ice cream.  Turn contraption on for 6 - 12 minutes.  Enjoy.

This recipe is adapted from Hamilton Beach, the company behind the ice cream maker.  The recipe was originally for the 1.5 quart model, so we had to adjust the quantities.  We also substituted blueberries instead of mixed berries, since Babygirl is a blueberry fan.

Ingredients

  • 1/2 cups frozen blueberries, thawed slightly and mashed
  • 1/4 cup of sugar
  • 3/4 cup low fat plain yogurt 
  • 1/4 cup half 'n half


Directions

  • Mix all ingredients into pre-frozen bowl.  Follow ice cream maker instructions.
Not bad for our first time with the ice cream maker, though we still need to tinker with the recipe a bit.  The flavor was great, but the consistently was too mushy.  This might just be an issue when using yogurt, but we'll experiment with different amounts of half 'n half, and how long to keep blending it.

First Post

Someday I will update this entry, when I have found my voice.  Have you seen my writing voice? I think it's hiding behind the couch.

We enjoy cooking and eating out.  When our daughter, Babygirl, started eating solids at 6 months, we were super excited to cook all her purees and meals.  As she's grown into a toddler, we've been trying to ride that balance between kid friendly foods, and meals that we also enjoy. 

What makes a meal toddler friendly?  Not too spicy, easy to chew (she's just getting her molars), easy to reheat in case she doesn't finish her portion, heart healthy.  It also helps if it's easy to store and reheat, preparations isn't too time consuming, and has at least 3 food groups per serving.

So far Babygirl has been a champion eater, going through occasional picky days.  She loves fruits and veggies, munching on whole wheat tortillas,  and has no idea what chicken nuggets are.  Bless her.